A BREIF OVERVIEW OF THE TRAILER ELECTRICAL SYSTEM

Hi friends! It’s been a while since I’ve updated what’s going on with the trailer. This summer was a littttttle busy for me (I graduated, got married and went on a few big trips!) but now I’m getting back to work on finishing this dang trailer! 

Doing all new electrical for the bean seemed daunting at first because I’ve only done very rudimentary wiring. After doing some research, it turns out it actually isn’t that complicated. I had a hard time finding a simple explanation for this type of electrical system so I’ll do my best to break it down for you here.

There are three different electrical systems in our new trailer wiring: 12 volt (direct current), 120 volt (alternating current) and trailer tail lights that are hooked up to the towing vehicle. 

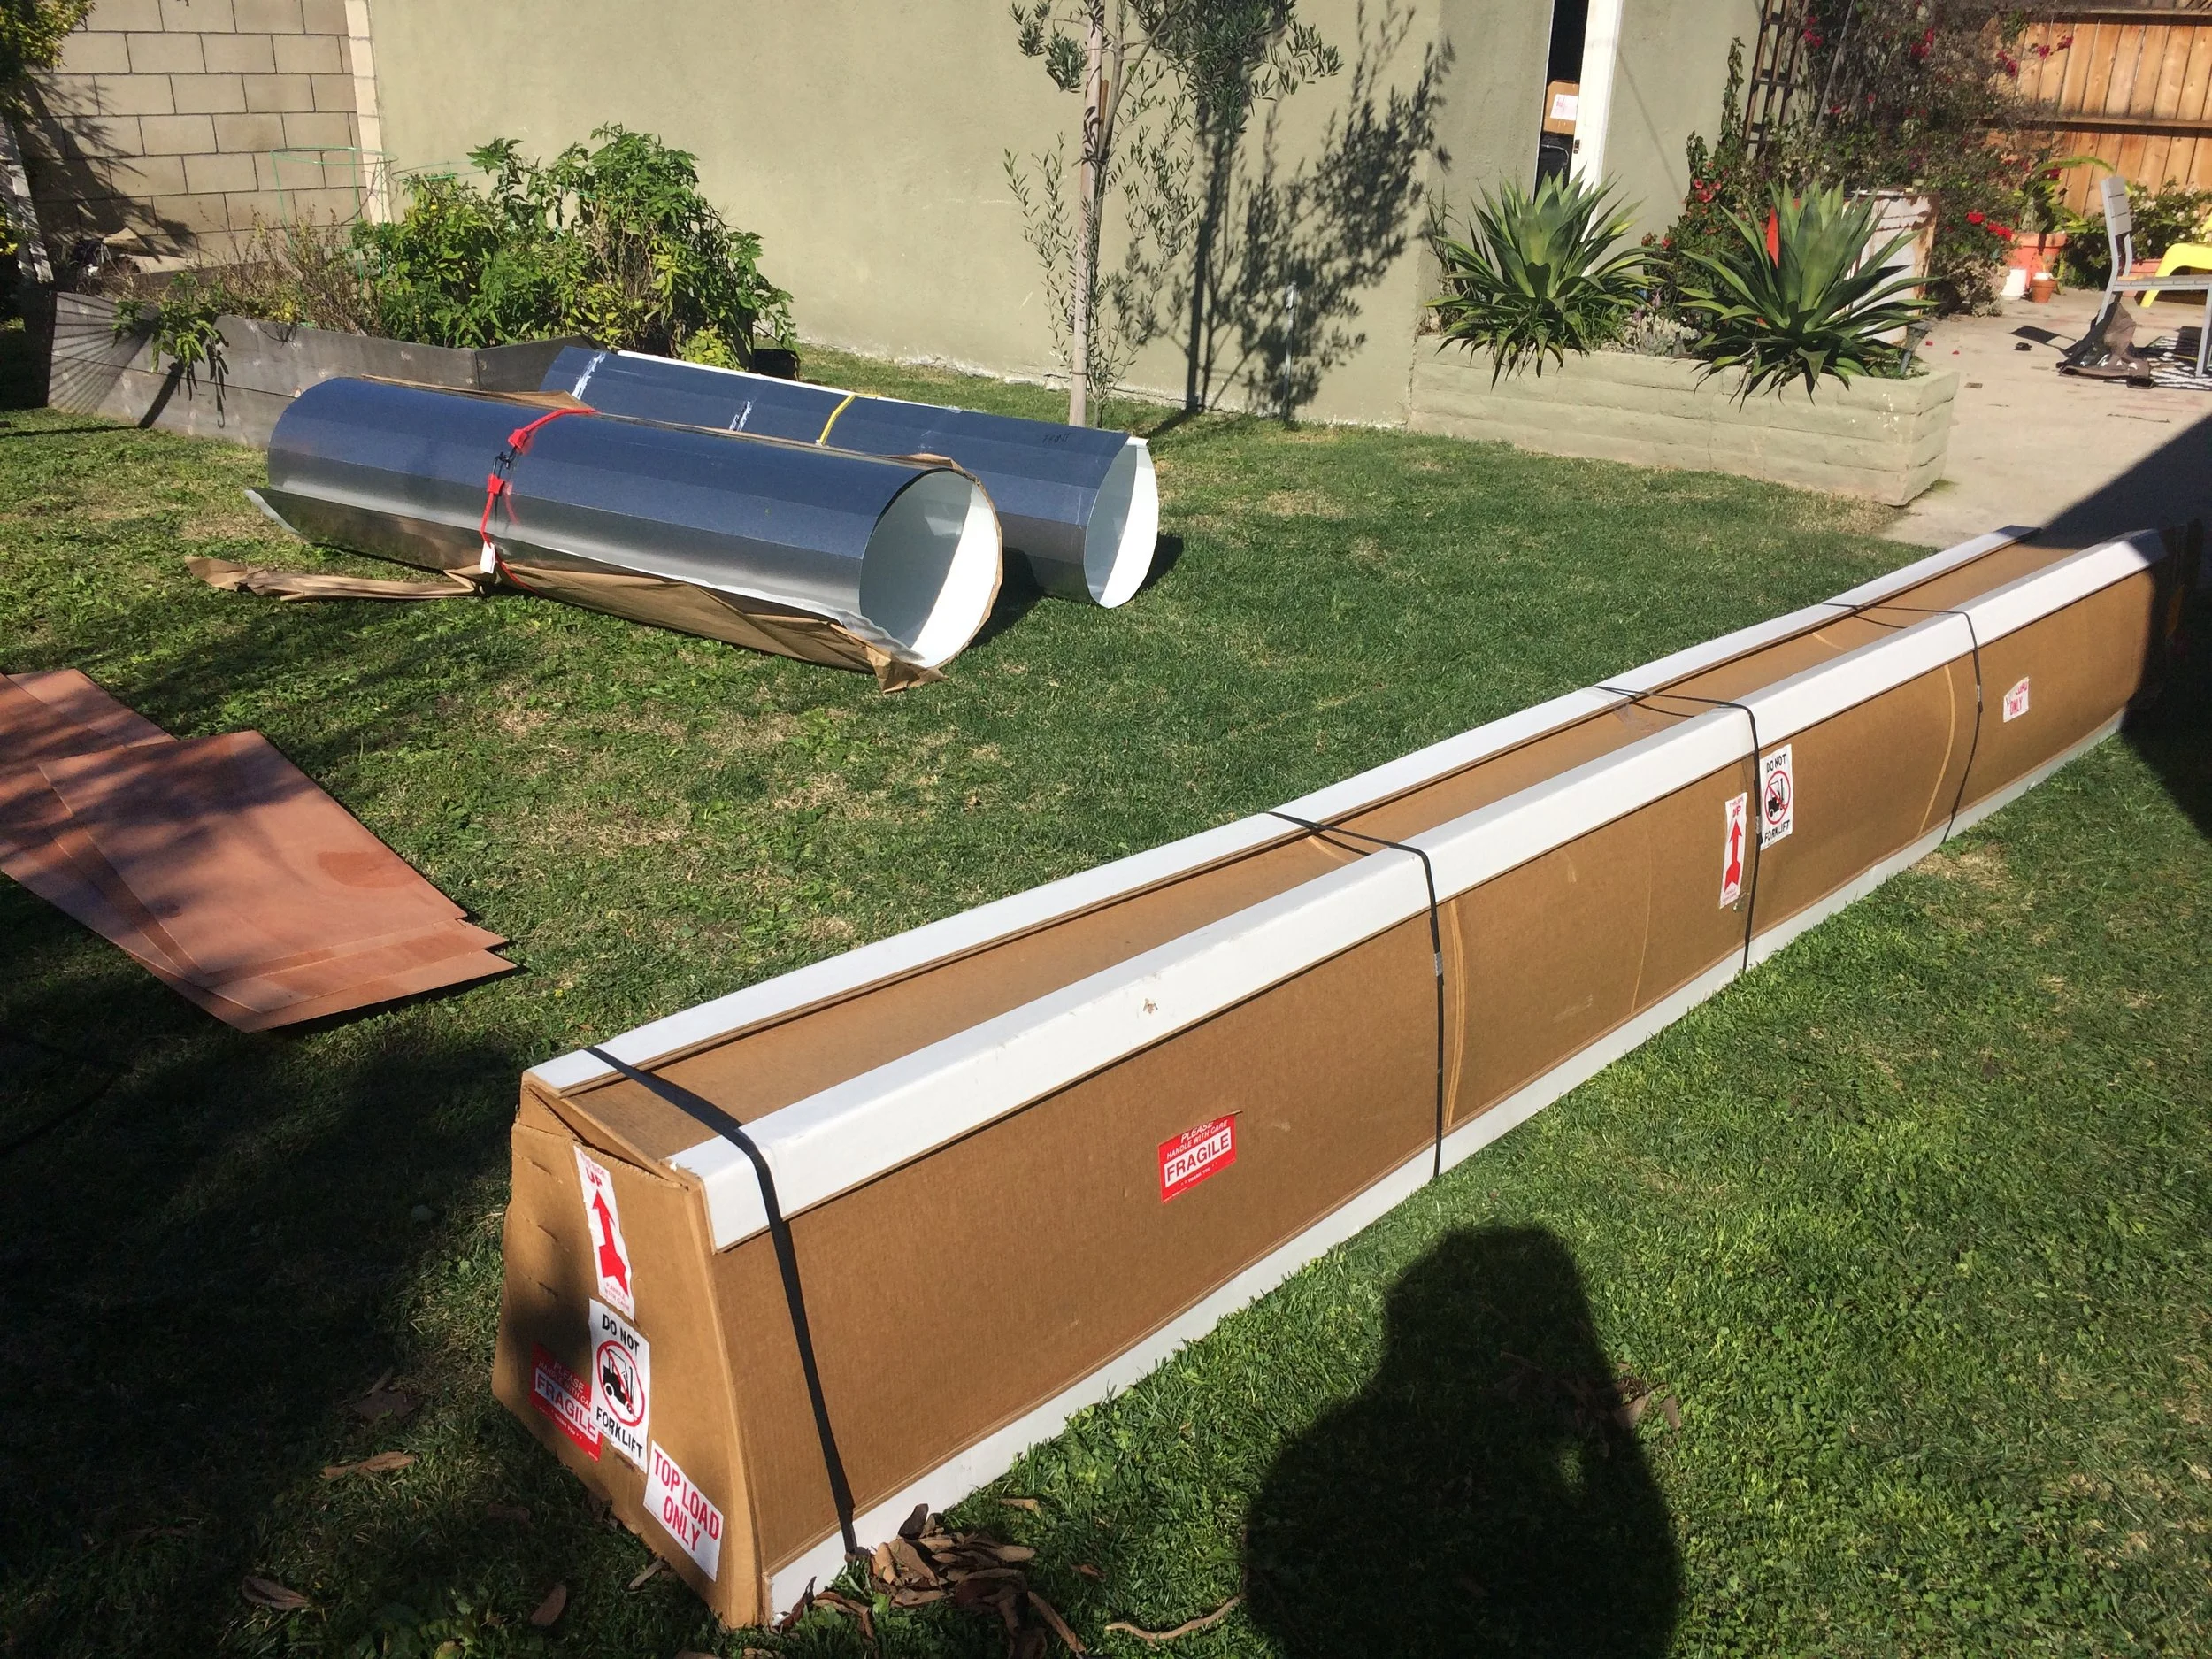
For the 12 volt system, we bought two 6 volt 225 amp Trojan batteries. The batteries are wired in series to bump the voltage up to 12 amps. The batteries are charged by a Renogy 100 watt solar panel. The solar panel comes with a charge controller that trickle charges the batteries. We also bought these 20' cables so we have enough length to either attach the solar panel to the roof or to set it up outside our campsite (we're not quite sure if the roof will be able to hold the weight of the solar panel yet ). Almost everything in the trailer will run off of the 12 volt system - the lights, fan and usb outlets. We wanted the trailer to rely mostly on solar power and only use 120v when necessary. 

The 120 system is only for shore power when we will be directly hooked up to a campsite’s power. The campsite’s power is connected to the trailer with a shore power inlet. The inlet is wired to a battery charger/inverter combo. The battery charger/inverter has one regular outlet on it. We don’t expect to have anything in the trailer that requires an outlet but we have one if need be. The only thing I can think of would be my laptop charger or possibly an extension cord. Everything else (basically just our cell phones) can be charged with a wall mounted usb outlet. Having minimal really outlets simplifies our electrical system.

The lights on the back of the trailer (brake light, turn indicator etc.) is hooked up to my car with this connector. This one is specific to my car so you’ll have to do some research on what you car requires before purchasing it. 

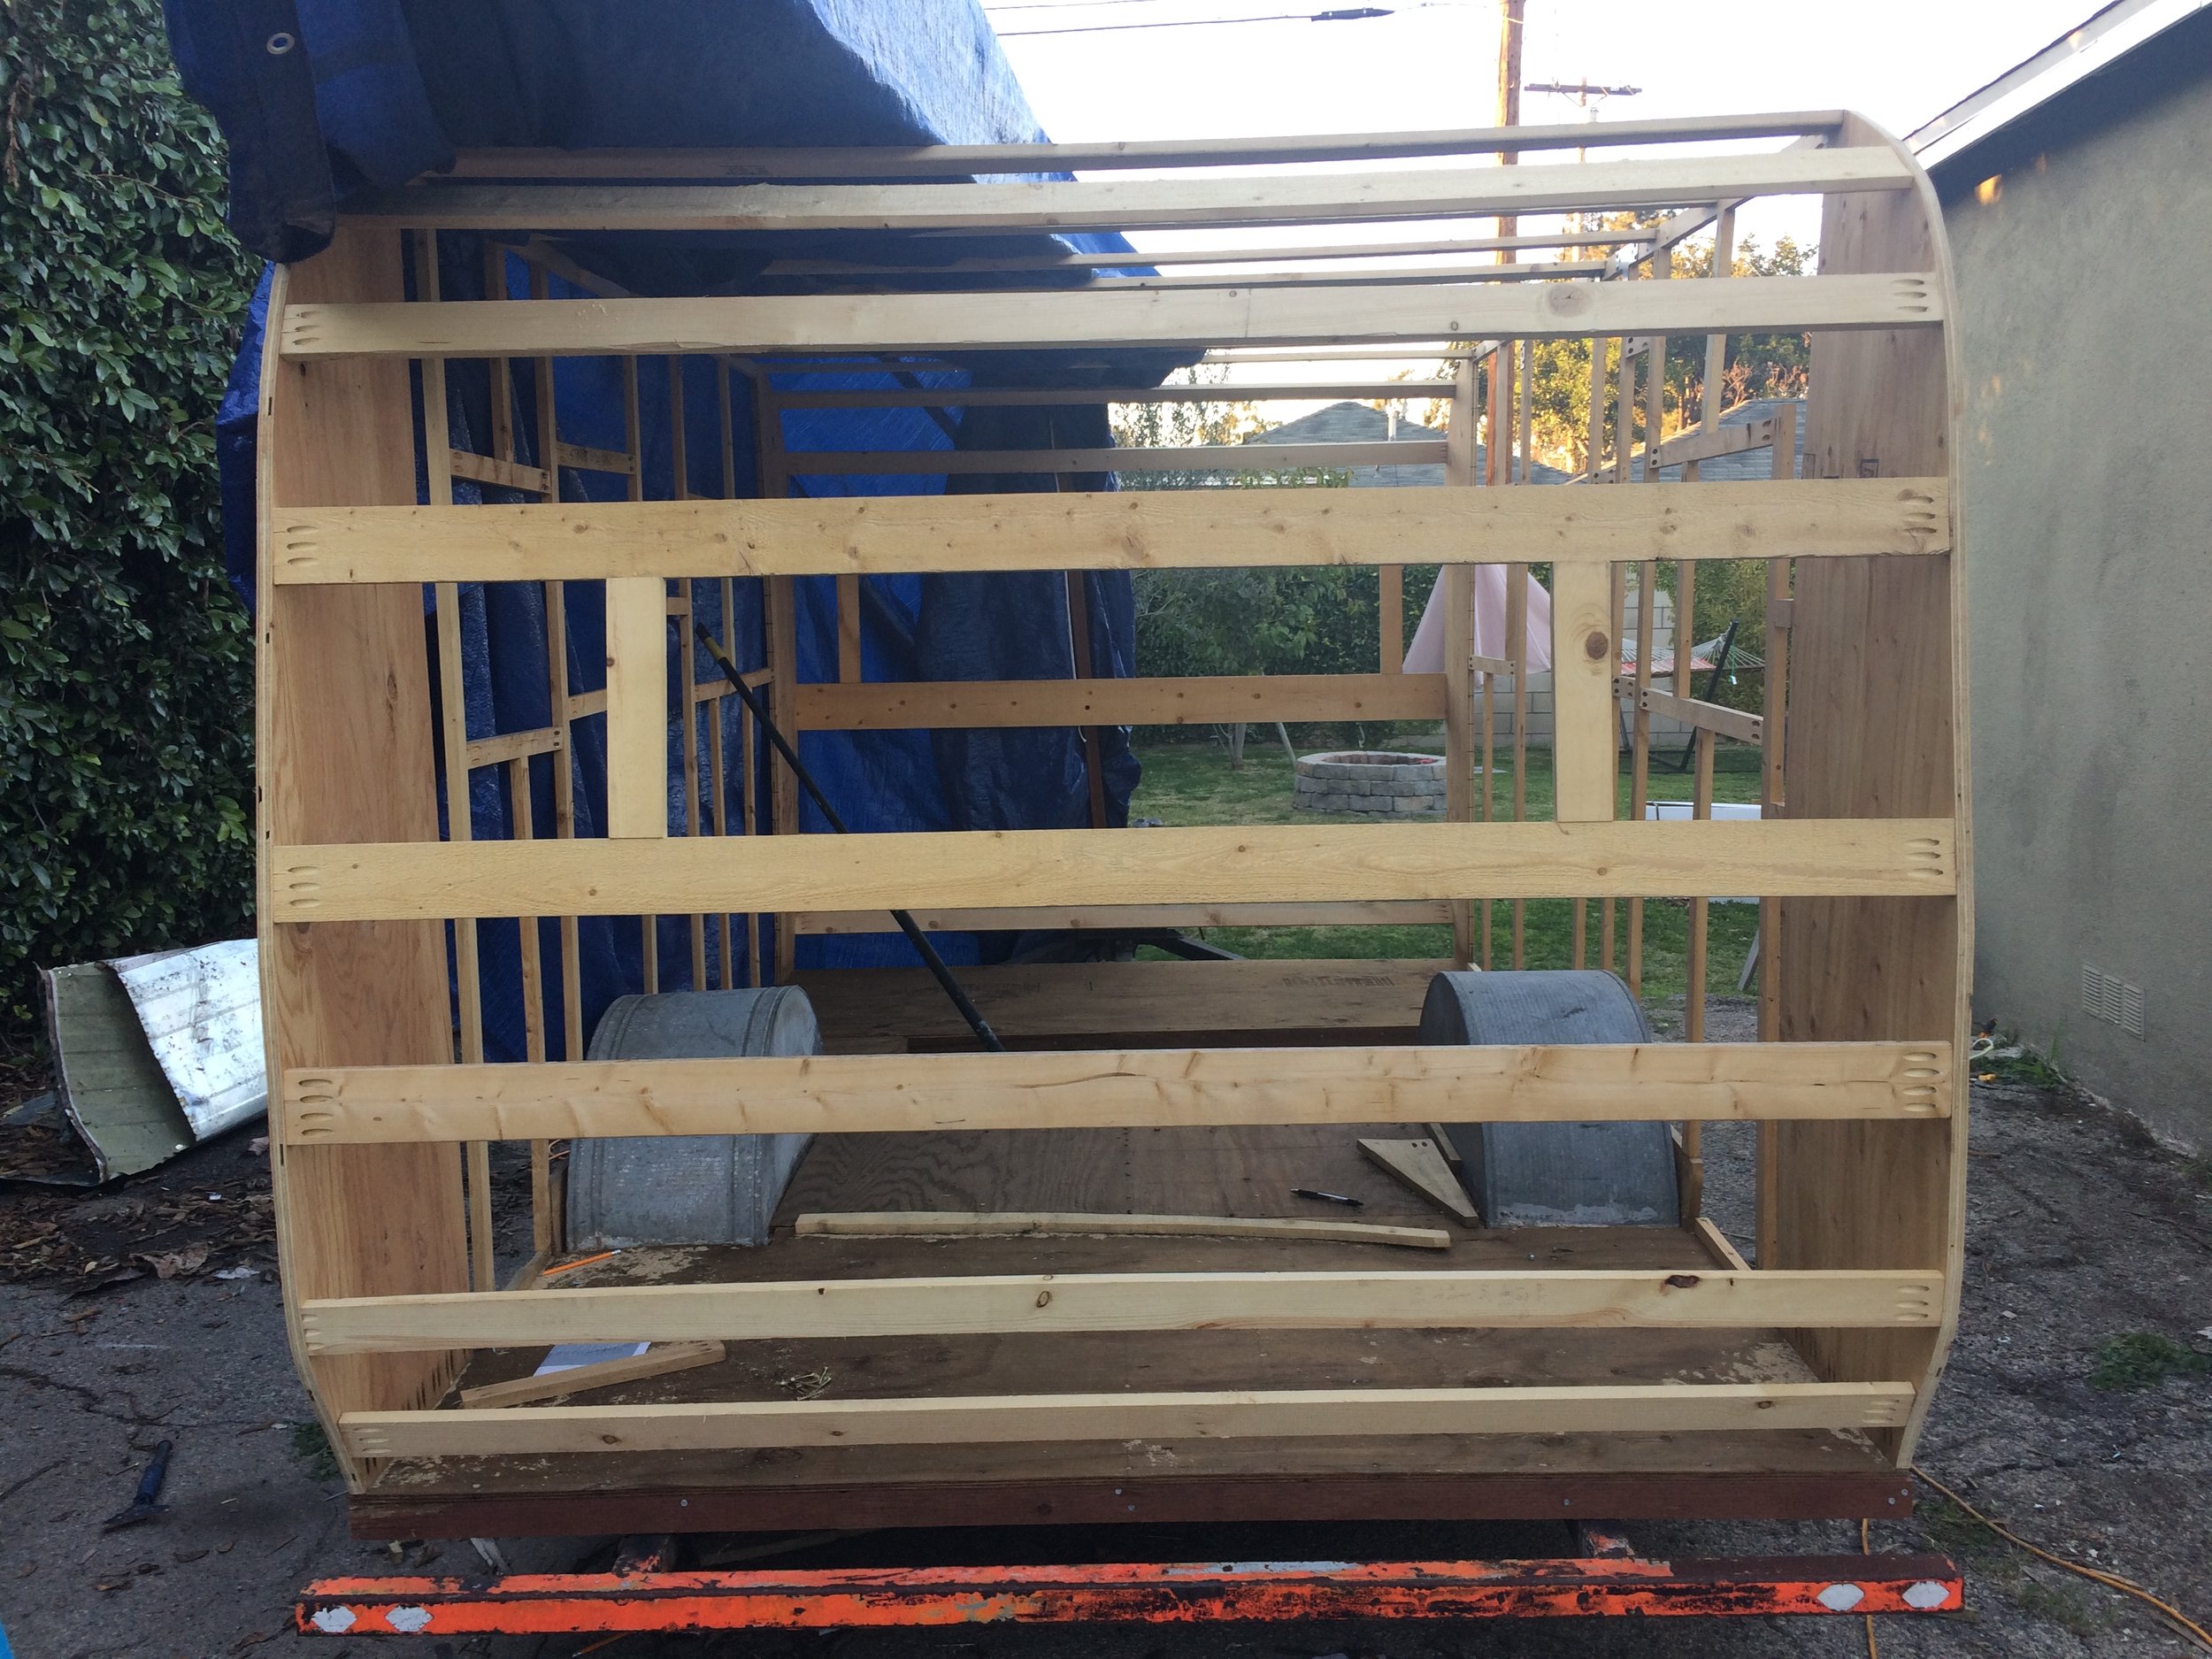
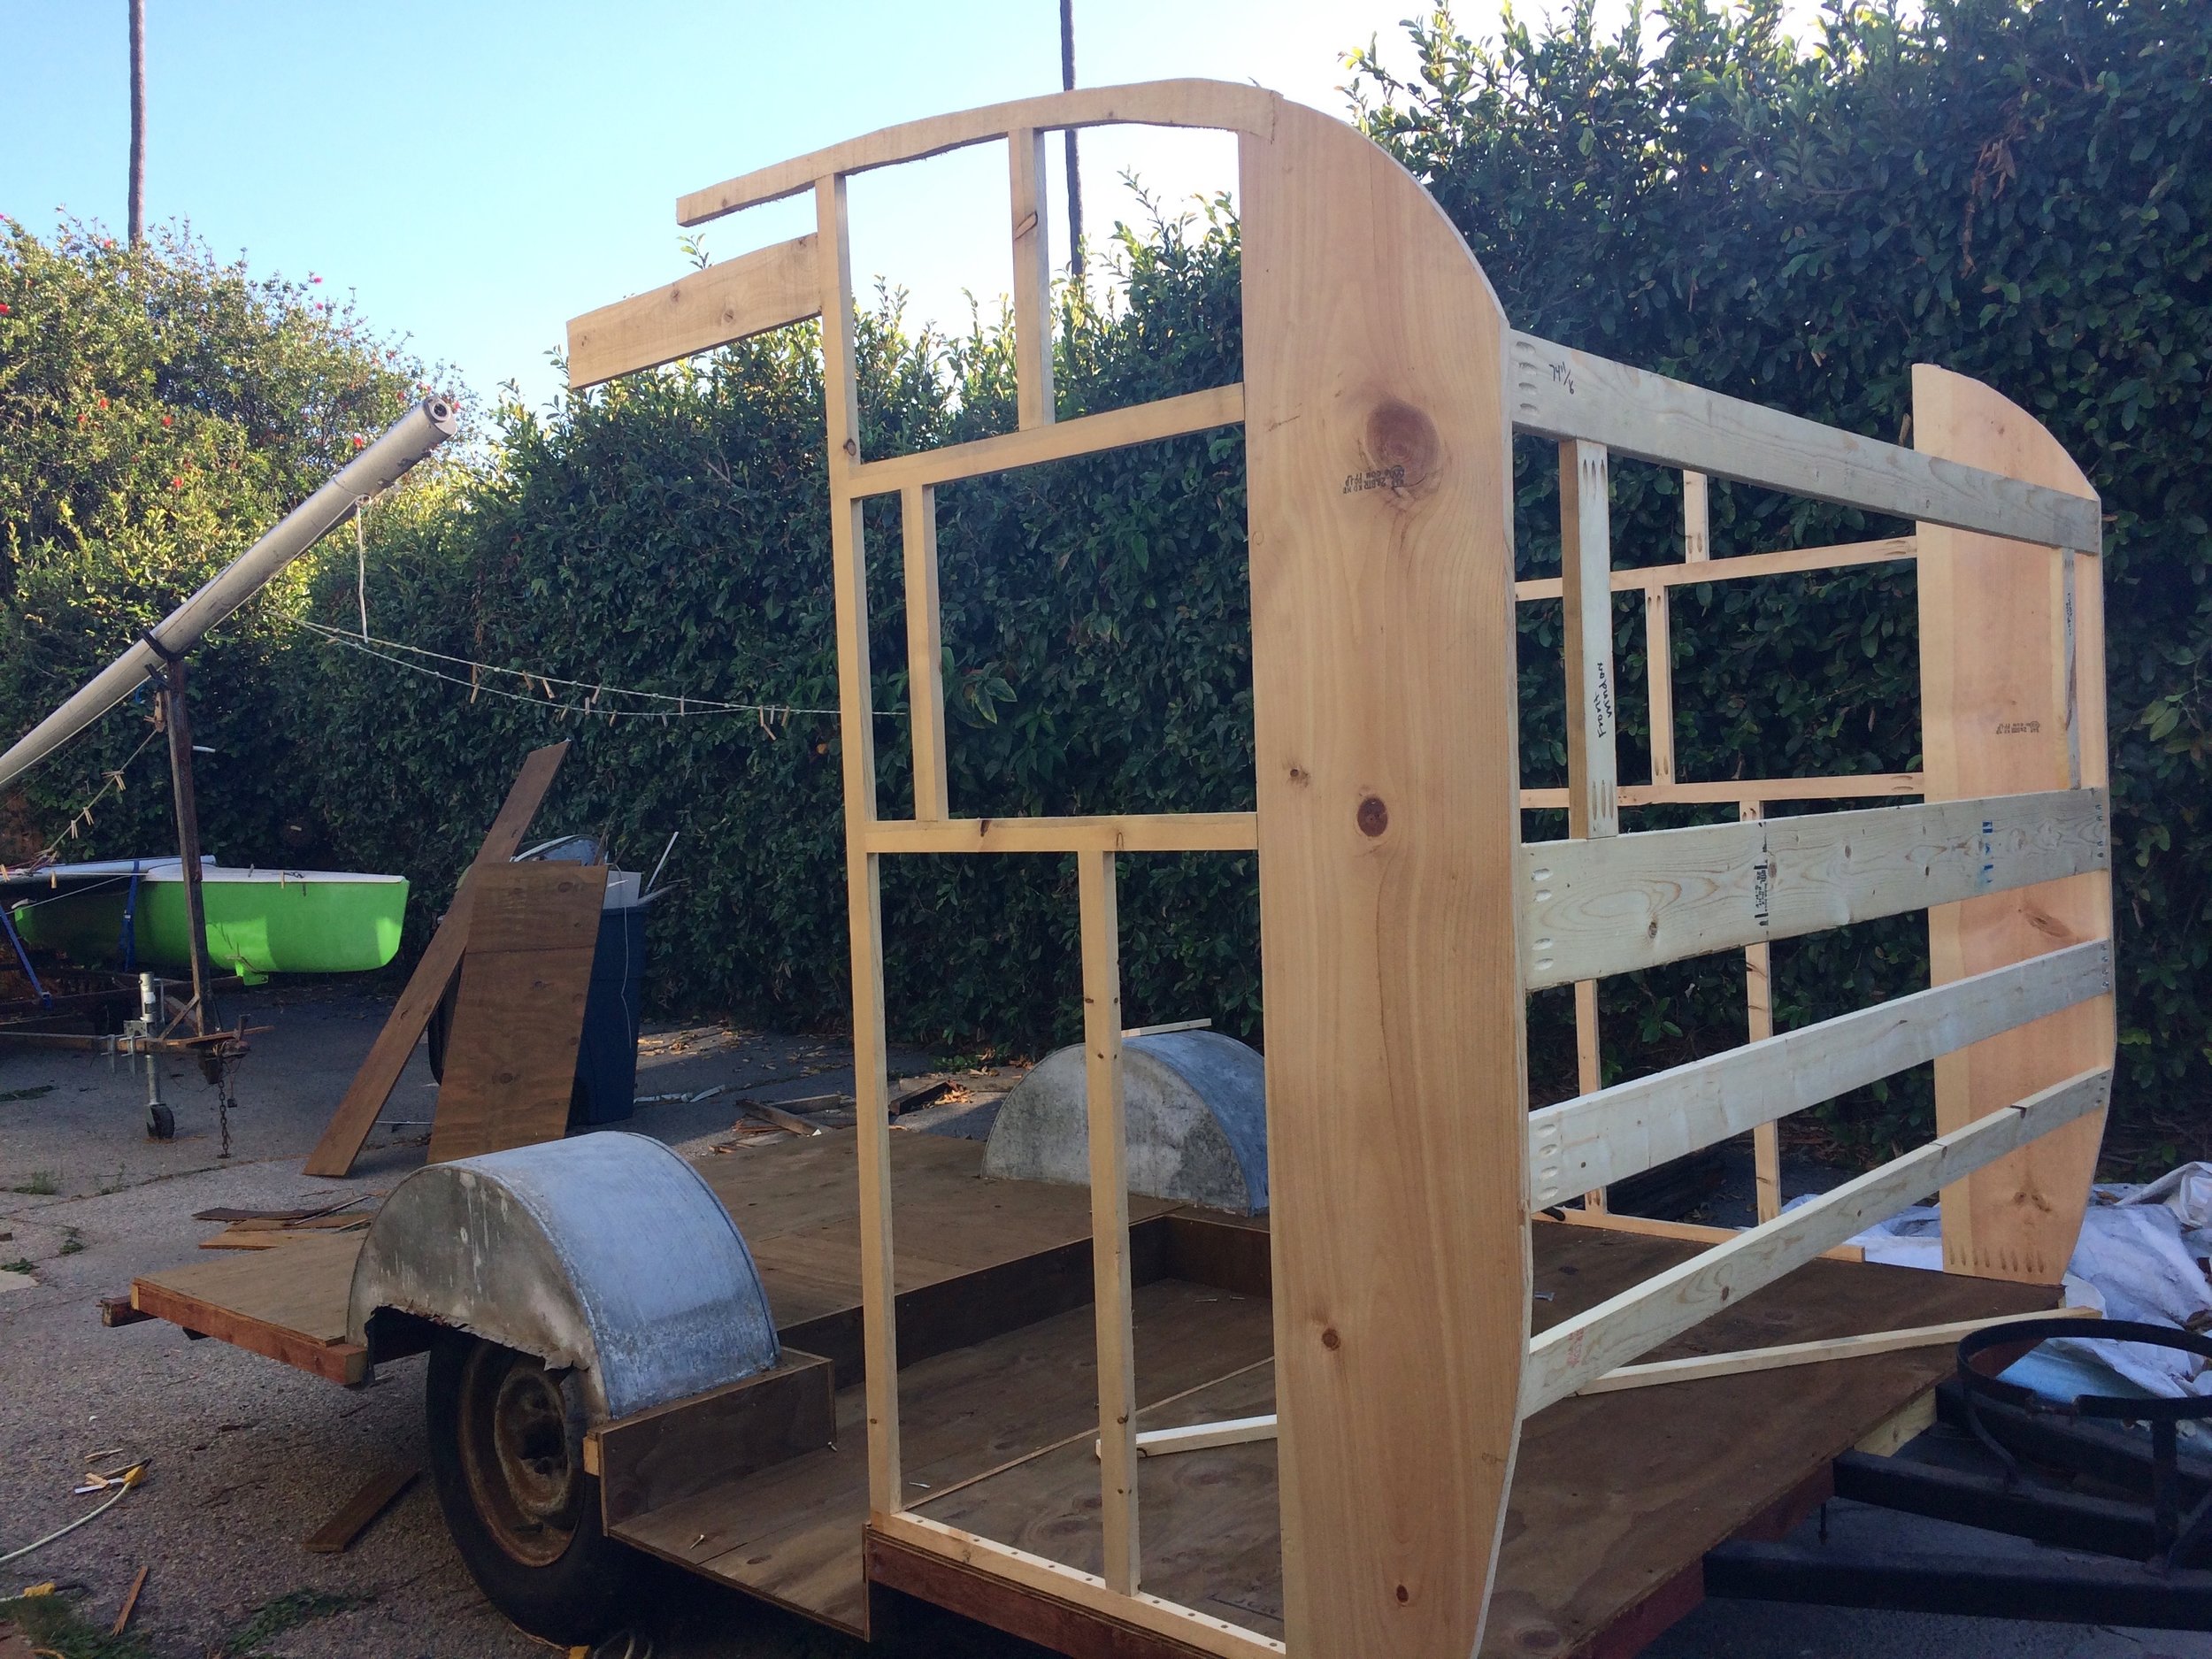
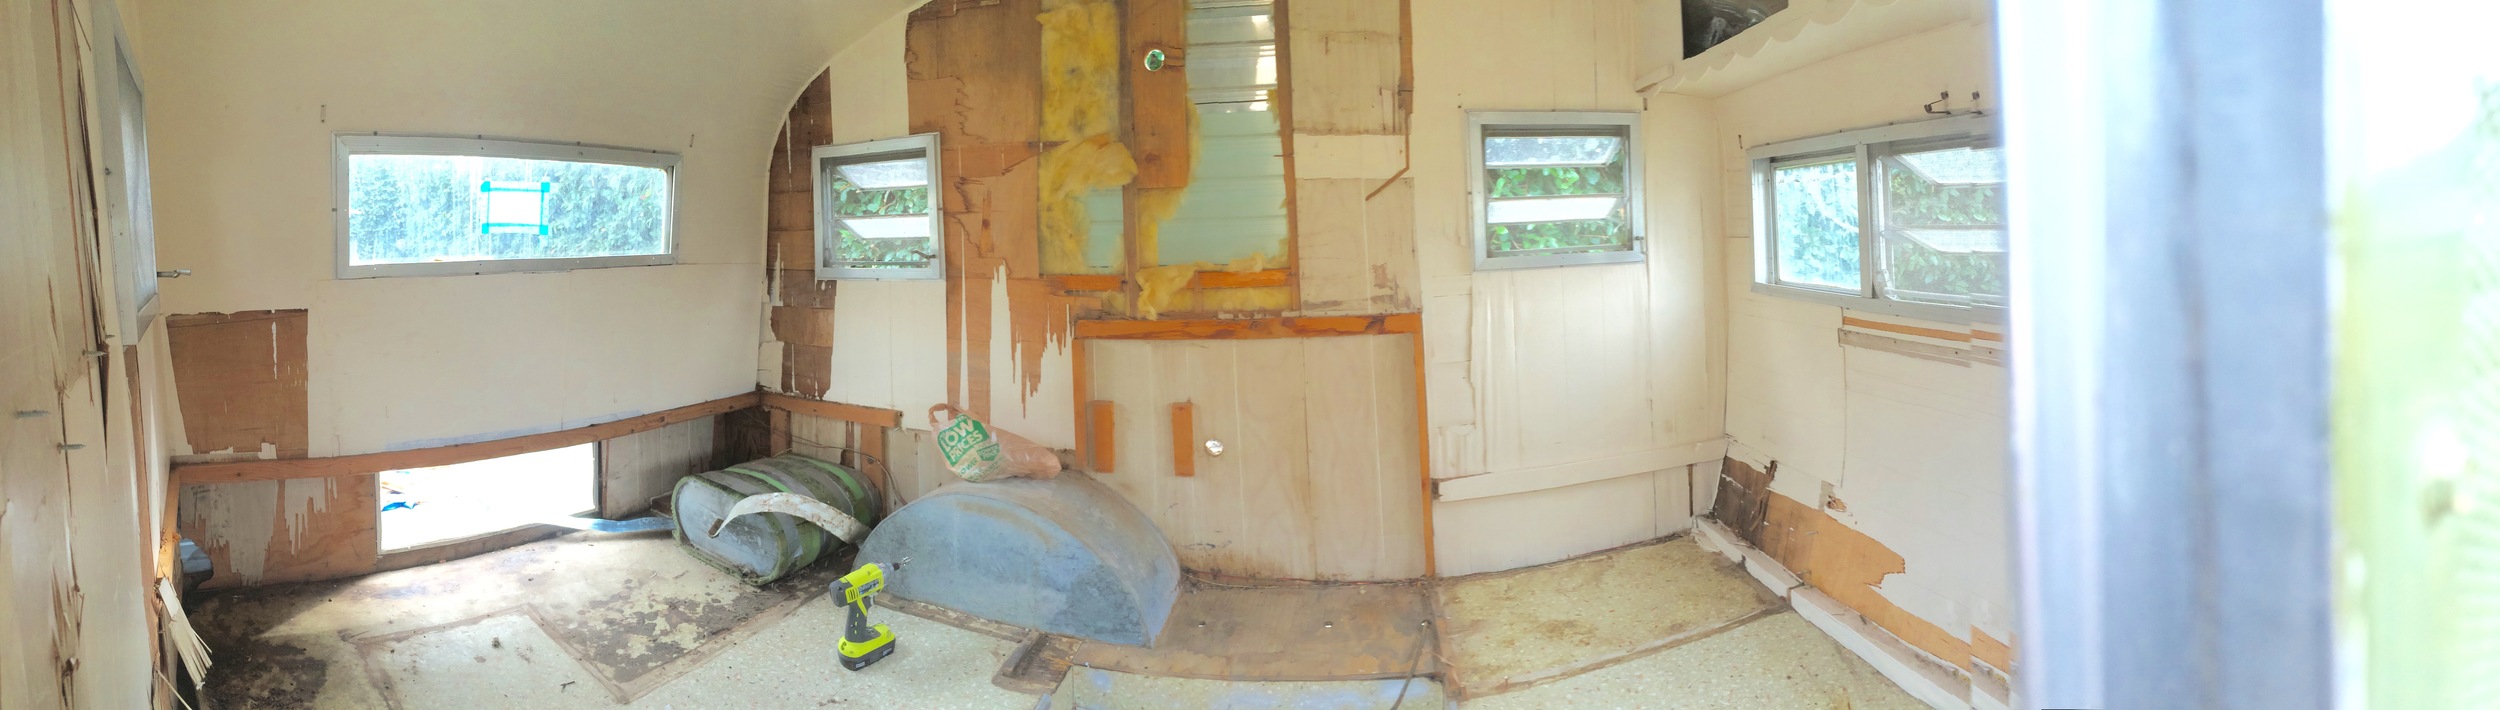
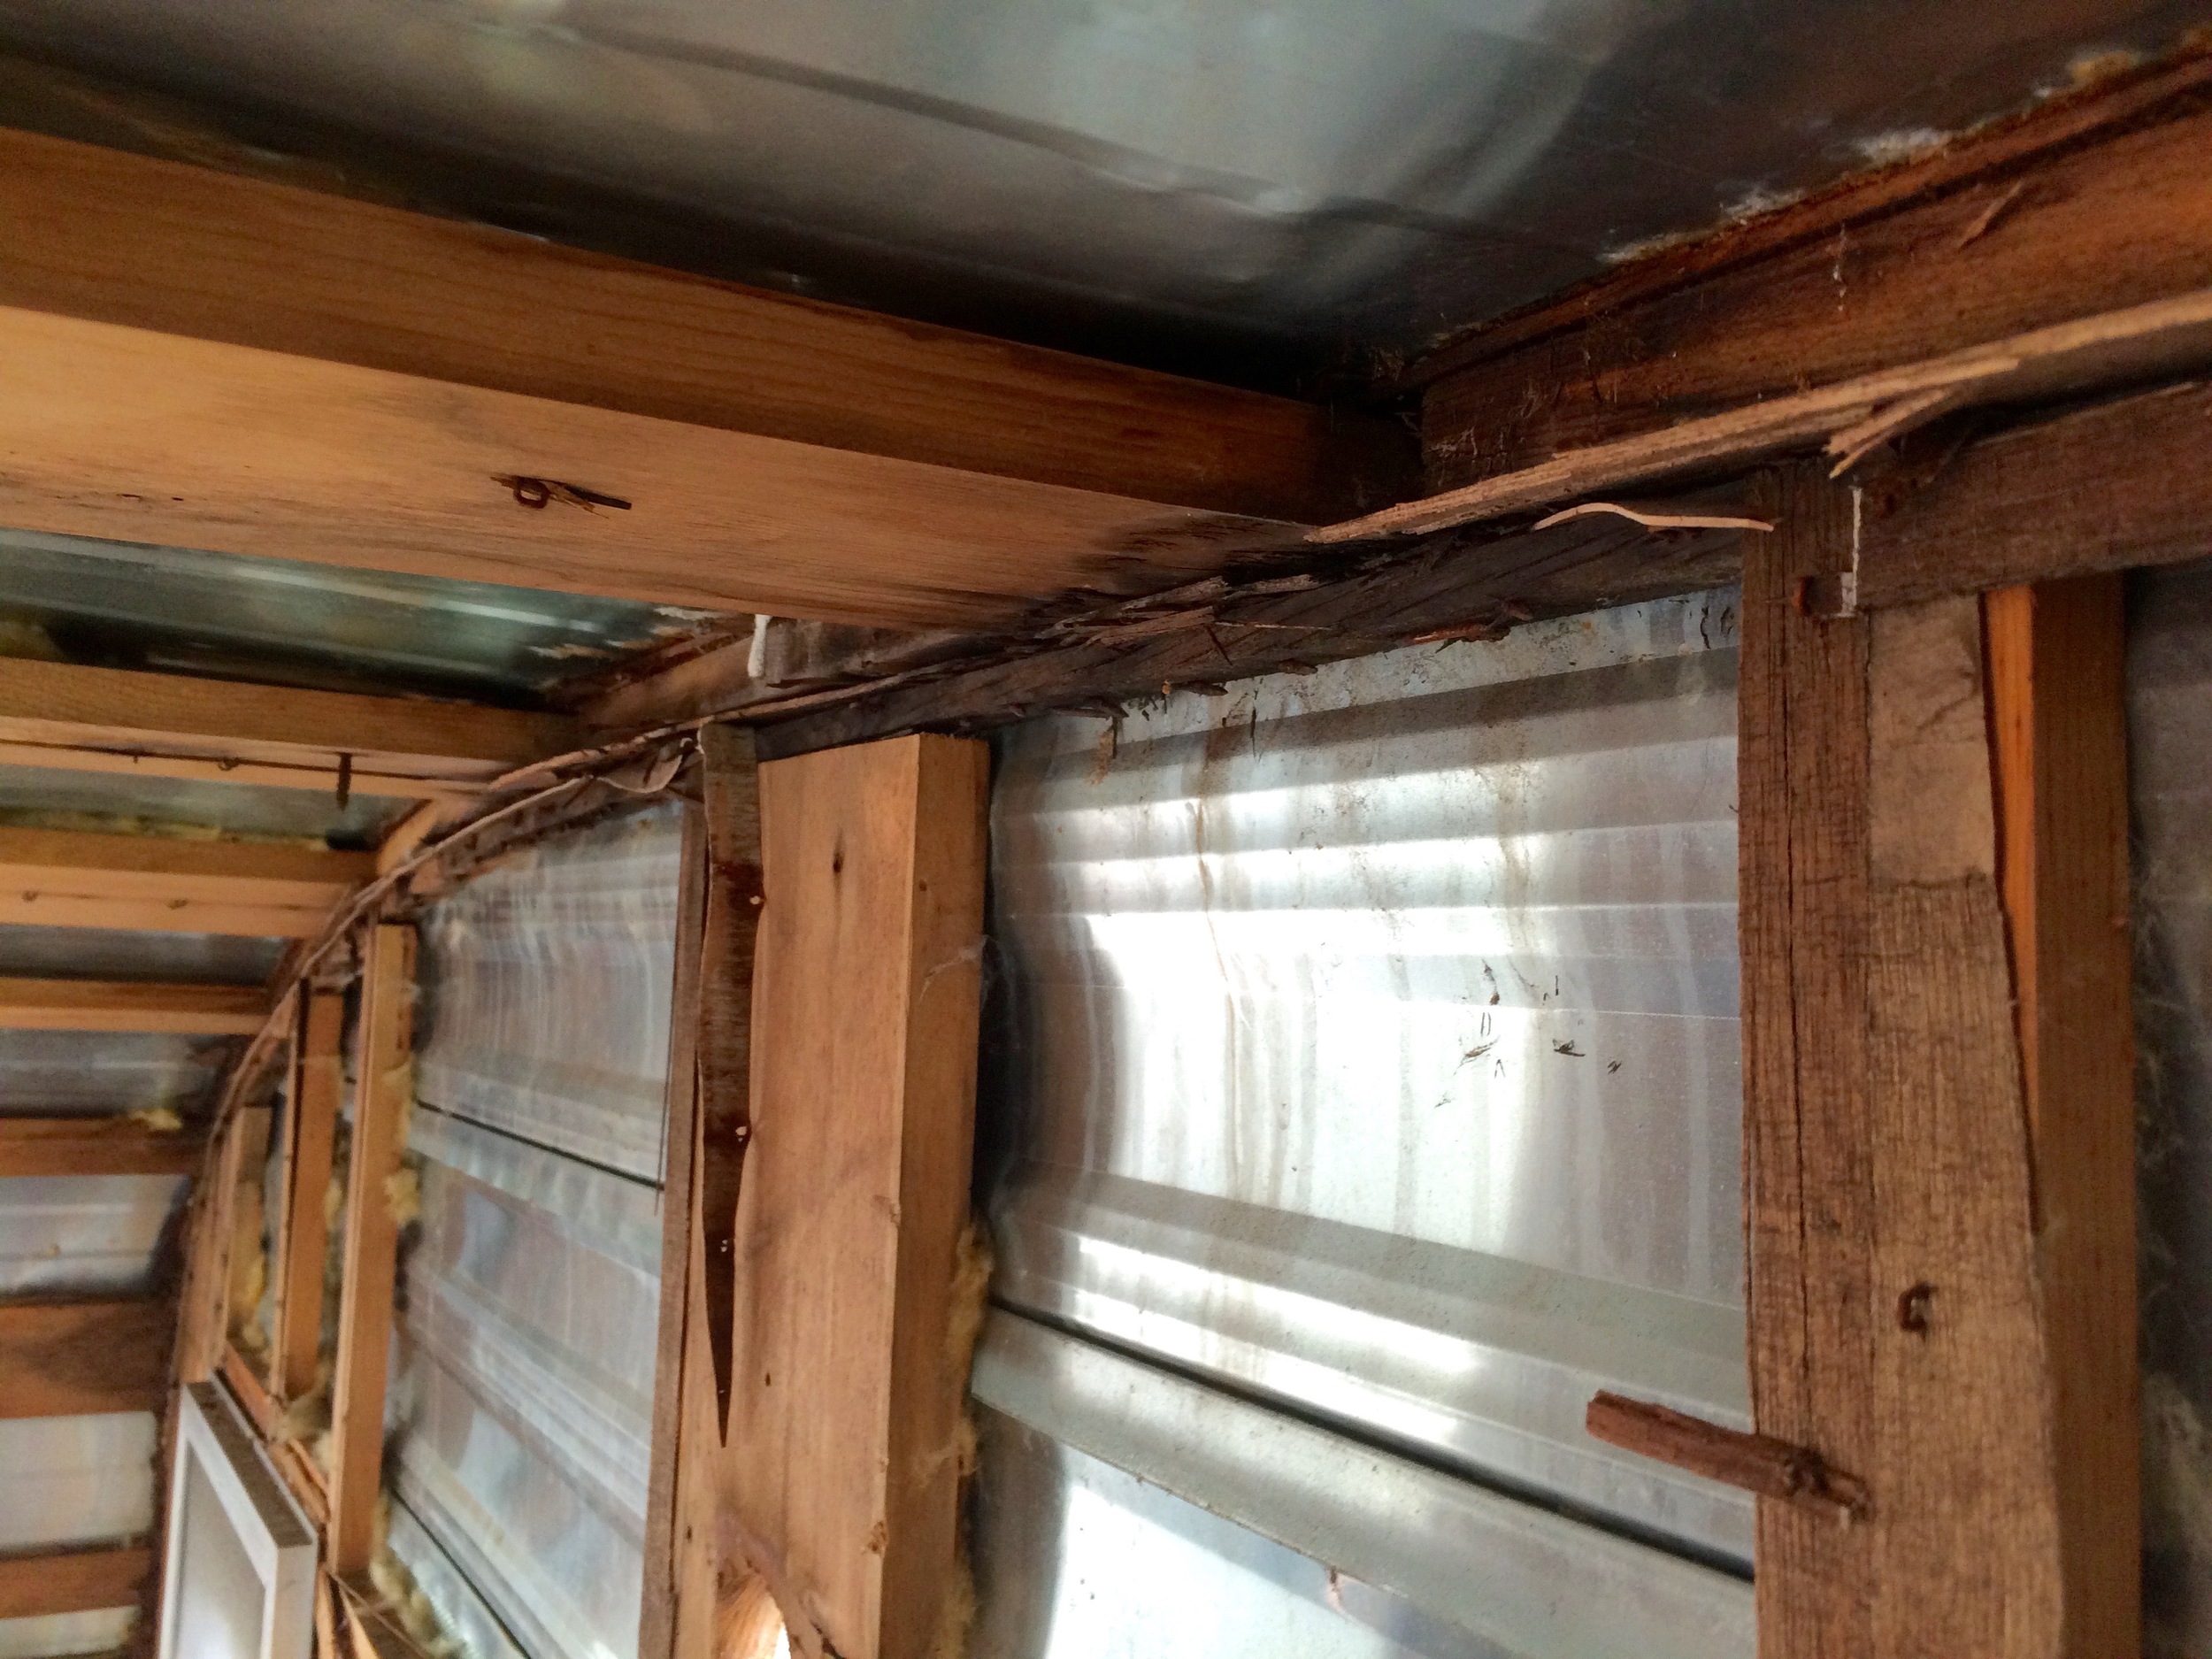
So far we’ve only hooked up the solar panel to the batteries. We’re still in the process of getting everything together for the 120 system. Next we’ll do a dry run of figuring out where all the lights will go inside the trailer (as well as our porch light). Once everything is laid out where we want it, we will install the interior walls. I’m really looking forward to having a semi-finished looking interior with real walls rather than just the framing we’ve been staring at for the past few months.

I will update once all the electrical is in, I just wanted to give a quick run down of how the three systems work!

Our solar panel + battery set up

Our solar panel + battery set up

Installing New Metal Siding

There's been so much progress on the trailer lately! I think I say this in every post, but it's finally starting to look like a trailer again. In the past few weeks we've successfully put up all of the aluminum siding (shoutout to Hemet Valley RV) with only one minor incident. Screwing up this step would have been very expensive- the aluminum siding is not cheap. Luckily, the only mistake we made is fixable without having to put up new siding.

The siding seemed really daunting at first. We didn't really know where to begin. Neither of us had worked too much with aluminum which is thin, flexible and easily dented. I started by grilling the guys over at Hemet Valley RV about exactly how we were supposed to install it, but there is only so much you can describe over the phone. Then I turned to MobileTec who has pretty much been my go-to for any trailer related questions throughout this project. After watching a few videos, it started to seem a little less intimidating. In fact, it's pretty straightforward. We started with the bottom piece of the street side, stapled that in and then cut the top piece to size and slipped the bottom piece into the S-Lock of the top piece. We actually did this step backwards (the top piece should be installed first) so we reinforced it with safety wire to the framing. It's secured well with lots of staples around the perimeter and safety wire on the S-Lock so I don't think it's going anywhere. 


Attaching the bottom piece of siding to the frame. Excuse the giant blue tarp in every picture. It's been raining like crazy here lately!

Attaching the bottom piece of siding to the frame. Excuse the giant blue tarp in every picture. It's been raining like crazy here lately!

Attached the s lock to the frame with safety wire because we installed the bottom first rather than the top piece first. Whoops!

Attached the s lock to the frame with safety wire because we installed the bottom first rather than the top piece first. Whoops!

All of the siding up with holes drilled at the corners of the windows to begin routing

All of the siding up with holes drilled at the corners of the windows to begin routing

Curb side, all attached and routed.

Curb side, all attached and routed.

After the siding is stapled in all around the perimeter, the excess metal got routed off. The aluminum on the sides of the trailer is routed to be flush with the frame so that when the roof piece is installed, it can be folded over the side and stapled down. We went through quite a few router bits during this process because the aluminum would melt and gunk up the bit. Other than that, the router worked pretty well for this purpose.  I've seen people cut out the window and door holes with tin snips which is what I imagine purgatory is like. That would take FOR-EV-ER. Trust me, use a router for this. My only word of caution is that the little metal shavings that the router spits out are molten hot so wear a face shield, long sleeves and pants. Even with all that protective gear on, those little metal bits still find a way to shoot directly up your sleeve or on top of your head. Ugh. But look how pretty those horrible little shavings are! We're considering floating these in resin for the dining table.


On the original trailer, both the sides and the roof were flush with the frame and covered with a L-shaped trim piece. While in theory that should have been water tight, it wasn't. The wood frame along the top of the trailer was completely rotted away from water damage. This time around, we're making sure everything is totally water tight by folding the roof piece over the side before installing butyl tape and J-rail. 

We unrolled the roof piece on top of the frame and strapped it down so it would stay put for stapling. This was one of the more infuriating steps in the siding process because our trailer is not perfectly square. The curb side of the frame is half an inch longer than the street side. I know that doesn't sound like much, but just that tiny bit made it impossible for the roof aluminum to lay flat and square. After lots of adjusting and re-adjusting, we just decided to make the back slightly more square with the frame since the booty of the trailer is what people will be looking at more often. I think it only looks crooked if you're looking for it. It's probably one of those things that will bother Chris and I but hopefully no one else will notice (unless you've read this blog, of course...).


Trailer booty with roof siding strapped down before stapling

Trailer booty with roof siding strapped down before stapling

After the roof piece went on, we cut excess aluminum off leaving only a half inch on either side. Our only choice here was to cut it with tin snips, which is one of the more boring and tedious tasks - not to mention there's razor sharp little bits that totally cut up my hands in the process. If you are restoring a trailer and have kids, I imagine this would be a great punishment for something. 

After the roof is trimmed to the correct size, we cut notches out around all of the curves then used a mallet to fold it over before stapling it to the side. The reason it had to be half an inch is because the J-rail, which acts as a kind of mini rain gutter, is about 3/4" deep. We wanted to make sure that the folded over aluminum would be hidden underneath the J-rail.

Trimming the roof piece to have a .5" overhang

Trimming the roof piece to have a .5" overhang

Folding the roof piece over the side. Notice the notches cut around the radius - this reduces any buckling of any excess material.

Folding the roof piece over the side. Notice the notches cut around the radius - this reduces any buckling of any excess material.

All of the siding on! We didn't route out the front or back window because there's more rain in the forecast and we figured we would wait until right before we install the windows to do that.

All of the siding on! We didn't route out the front or back window because there's more rain in the forecast and we figured we would wait until right before we install the windows to do that.

Interior shot. It's starting to look like a trailer again!

Interior shot. It's starting to look like a trailer again!

So that's how we installed the siding. I think it took us about five or six days in total. Oh, and that small, fixable mistake I mentioned at the top of this post? We forgot to attach the top piece of the door jamb when we built the frame and routed the door hole way too big. Our original trailer door doesn't fit anymore which is a bummer but the door was kind of a POS anyways. Because our door doesn't fit, neither does our old door jamb. In the next post, I'll talk about how we rebuilt our door jamb and door from scratch! 


Sources for siding:

Mobiltec - Installing Siding Part I

Mobiltec - Installing Siding Part II

Mobiltec - Strapping Roof Metal to the Trailer

Hemet Valley RV

Framing Completed!

I've had the past month off of school and planned on getting as much work done on the trailer as possible during that time. Of course, that month happened to be the rainiest month in California in years. Between the holidays and the rainy weather, I managed to squeeze in a few good work days and finally finished the framing! Even though we're not moving at the pace I expected, it feels like we're finally making some progress over here.

Framing completed! Please excuse the giant blue tarp. It's been raining like crazy here lately and we've rigged up quite an elaborate tent contraption that isn't very easy to remove for pictures

Framing completed! Please excuse the giant blue tarp. It's been raining like crazy here lately and we've rigged up quite an elaborate tent contraption that isn't very easy to remove for pictures

Trailer booty

Trailer booty

Where to begin... we've had so many unexpected problems with the framing (although at this point I shouldn't be surprised anymore). We had previously taken all the old frame parts and traced them to use as a pattern for the new trailer. However, the old trailer had a piece of curved plywood that ran along the top, making the trailer appear bean-shaped that we forgot to save or get measurements of. To recreate this, we would have to either steam plywood or cut that same shape using a jigsaw. Since I've never steamed plywood before, I tried my hand at cutting it with the jigsaw. This proved to be incredibly difficult since half of the frame was already up on the subflooring. I tried making a model out of cardboard first and then cutting it out of wood, I tried attaching wood to the frame and then cutting it and nothing seemed to be working. I couldn't replicated that exact curve that we had before. So instead of spending the rest of my life trying to figure out how to create the curve, we decided to get rid of it. Our new trailer won't have a curved ceiling, instead it will be flat.

That's right - we changed the shape of the trailer! I'm sure anyone reading who is a vintage trailer enthusiast is screaming at their computer right now. I know this isn't technically considered a "restore" anymore, but I would like to finish this project before I die and at the rate I was going before, that wasn't going to happen. 

I designed the trailer shape in Rhino (CAD software, similar to sketchup). I input the existing height and chassis measurements and then from there started experimenting with shapes that we liked. I looked at other trailers that had flat ceilings and worked off of those, as well. I picked a shape that I liked and found measurements for every three inches. I also took better measurements every inch at the top and the bottom where the curves were more extreme. 

After getting all the measurements, we converted the decimals to fractions and got to work drawing out that shape onto a new piece of plywood. Once we had all the coordinates marked, we connected the dots and cut the shape out with a jigsaw. 

After we had our new back piece in, it made everything so much easier. The previous back piece was installed at an angle (which we didn't make a note of before demoing the trailer). Our new piece rests flat on the subflooring and is much easier to connect to the rest of the framing. After that, the rest of the framing was a piece of cake. We used our pocket hole jig quite a bit. I love that thing so much! We also reinforced some parts of the frame, like around the doors and windows, with metal brackets.

After we finished our framing, we ordered all of the aluminum we needed for our siding. We ordered it from Hemet Valley RV who made the entire process really easy and straight forward. Our metal just arrived a few days ago and now we're ready to get started attaching the siding! So exciting! 

Unpacking our not so small boxes of aluminum siding. Over 250 lbs of metal!

Unpacking our not so small boxes of aluminum siding. Over 250 lbs of metal!

Until next time, friends. 

- Marla 

Finally, some updates!

Welp, it's been quite a while since my last post and since any significant trailer progress has been made. I spent the summer doing an internship, working at school and doing lots of freelance design work, so finding time to work on the trailer was hard. Thus, things move very slowly. But now I have a lot of updates and progress to show you! Finally!

The subfloor proved to be much more challenging than I thought. I redid the entire subfloor at least three times for various, stupid reasons. Something I am seriously regretting in hindsight is not taking measurements of everything on the trailer before we demoed it. We spent an embarrassing amount of time staring at pictures of the trailer, trying to figure out how many inches away from the wheel well that piece of wood was because I didn't think to take measurements. 

Not having a table saw or the proper workspace also makes everything much more difficult. We considered just biting the bullet and buying a table saw ($$$$) but instead ended up purchasing this Kreg rip saw jig  instead. I was skeptical at first, but this thing works just as well and actually feels a lot safer than using a table saw because there's no possibility for kickback. And it was less than $30! 

Chris using the rip saw jig 

Chris using the rip saw jig 

I spent a lot of time cutting (and recutting) pieces for the framing that sits underneath the plywood. This was another one of those situations where my life would have been 10000000 times easier if I had just measured things before tearing them apart.  LESSON LEARNED. 

After finishing the framing of the subfloor the first time, we laid out pieces of plywood on top and stood on it to make sure the floor actually had enough support. I'm glad we did that, because there definitely was not enough support, especially if you stood in one particular spot, the ply wood bend under our weight. So I took the framing out of the chassis and added additional support beams.

Cutting pieces of the subfloor framing in my makeshift backyard woodshop

Cutting pieces of the subfloor framing in my makeshift backyard woodshop

Framing under the subfloor, view from back of trailer. 

Framing under the subfloor, view from back of trailer. 

Framing of the subfloor, view from front of trailer.

Framing of the subfloor, view from front of trailer.

After the framing was completed, we cut and attached the ply to the framing. This also took us much more time, wood and trips to home depot than anticipated for a myriad of different reasons, none of which are worth noting. It was mostly just a lot of trial and error and stupid cutting mistakes. The whole subfloor process was super frustrating and I am SO glad we're done with it. 


Attaching the plywood to the framing and wheel wells.

Attaching the plywood to the framing and wheel wells.

Completed subfloor!!!! 

Completed subfloor!!!! 

Completed subfloor, view from street side.

Completed subfloor, view from street side.

Now that the subfloor was completed, all we had to do was attaching the framing of the trailer that we had built back in March. Before we tore down the trailer, we made a replica of the frame and stored it in our garage. However, a few days ago we went to pull out all of the frame pieces and multiple large pieces were missing. And not just like a little piece of wood here and there - I mean, pieces that look like a window frame or an entire wall of the trailer. They had just vanished. We had never taken them out or moved them since we built them, and we were certain that we had built them. This was the weirdest, most frustrating part of the whole process because the whole time we were doing the subfloor, we kept saying, "well the next step is going to be so easy because we already built the frame!" and then realizing we had to rebuild a large portion of the frame. 

So, after taking a much needed break for a few days, we got back to work on the frame. It actually didn't take nearly as long as we had anticipated, and we got most of the front of the trailer up in one day! This has definitely been the most satisfying part of the whole process so far because it's finally starting to resemble a trailer again!! Finally!

Front of the trailer frame

Front of the trailer frame

Down to the Chassis

After taking the shell off, we realized that we needed to rebuild the whole frame. That was the easy part; we took the existing frame and copied each piece. The curved pieces we traced onto a new piece of wood and cutout with a jigsaw. We attached all the perpendicular pieces with a pocket hole jig which is so much sturdier than the previous weird squiggle, press-in staple things. That’s the technical term, actually. 

squiggle staples holding the trailer together. terrifying. 

squiggle staples holding the trailer together. terrifying. 

New and improved framing!

New and improved framing!


However, the frame sits on the subflooring which also was rotted and needed to be replaced. We assumed ripping out the floor would be just like the rest of the demo we had been doing - quick and easy. Well, the people who built this thing really didn’t want the floor to come apart. Each piece of ply was nailed about a billion times into the wood pieces running along the chassis. Not to mention, completely rusted and impossible to pull out with a hammer. I want to shake the hand of whoever designed a sawsall. That is a miracle tool. 

Taking the frame off

Taking the frame off

The other pesky thing about removing the subflooring was carefully taking off the wheel wells which had been folded under a layer of ply and nailed another billion times. 

Wheel well or mid-evil torture device?

Wheel well or mid-evil torture device?


So, here we are, in the middle of a complete trailer rebuild that we hadn’t anticipated. We are down to the rusty chassis which we’re next going to attack with a angle grinder and some rustoleum. It’s all building the trailer basically from scratch from this point on which is SO exciting. It feels like a long time coming (even though it’s only been three months). My goal is to have the trailer in full camping-mode by early August. Just in time for some summer camping, music festivals and birthday celebrations. But who knows, some building surprises could pop up in the process. 


Brace Yourself

So after I spent so many horribly long hours scraping up the vinyl flooring and tile glue, I could finally get a better idea of what the floor situation was. In the front of the trailer, it looks like its in great condition. However, the back of the trailer where the water tank sat is just completely rotted out. Not only is the floor rotted, but the framing all along the bottom rear is, too. In order to replace the framing and floor, the aluminum shell needed to come off. In order to take the back piece off, we needed to take off the gold trim along the sides. Once those two things were off, it just seemed like the best thing to do was keep going and take all the shell off. 


The scary thing about this trailer is that it was literally being held together with paint and caulking. The shell was hardly attached to the wood framing. Most of the nails had been completely rusted through. After taking the shell off, it felt like the trailer could fall apart at any moment so we added in a few 2x4s for bracing. 


Once the shell was off, we could really get a good look at how this thing was built. It was built from the ground up meaning that the walls were sitting on top of the floor. Those walls we thought we could just replace the rotted pieces of? They’re going to be entirely re-built using the old walls as a template. Once we use those walls as a template, they’re trash. But before the new walls will go up, a new floor will go in and then the walls will be attached on top. Still with me? It’s a lot, I know. 

Remember how I keep saying “there’s no way this thing could possibly get any uglier” WELL IT JUST DID.


Naked bean!

Naked bean!

I’m so so so excited to get started on the walls, though. So far, it’s been a lot of demo and a lot of piles of trash and A LOT of insulation getting in my clothes/hair/face. I’m ready to actually start building!


Scrape, Eat, Sleep, Repeat.

The past week or so we’ve gotten a few good work days in on the lil bean. After gutting the interior walls to assess them, we next needed to check out the condition of the floors. We knew there was water damage in the corners of the trailer, but in order to really figure out what needed to be done, we had to rip out all of the linoleum flooring. 

linoleum, the enemy. 

linoleum, the enemy. 


Scraping up linoleum that has been glued down for 50 years is a horribly tedious process. That glue is no joke. I spent a few hours struggling to get up off before realizing I needed a new plan. I watched a few youtube videos and the general internet consensus was that its much easier to peel off linoleum once it is heated. So I broke out the good old heat gun and started heating up the floor. I ran it on high heat and held it over one section of the floor for about 15 seconds and then LIKE MAGIC that stuff came up. Magical, magical heat guns. What wasn’t so magical was the smell of old, burning floor glue. Wear a ventilator, y’all. 

Black Tile glue under the linoleum

Black Tile glue under the linoleum


So, like two days later we had heated and scraped up all of the linoleum and what we were left with was this thick layer of black tile glue. The trick to getting this up is to spray the entire floor with a mist of water and then lay newsprint on top of it and spray it again with more water. Every few hours, keep spraying the newsprint. Eventually, brown spots will appear on the paper which is a sign that the glue is softening. We let it sit overnight before taking off the newsprint and scraping the glue off. It came off so easily and the plywood floors underneath were BEAUTIFUL. There is only one piece in the back where the water tank was seated that is rotted that we will have to replace. Other than that, the floors are in good condition. 

Laying down wet newsprint on top of the tile glue

Laying down wet newsprint on top of the tile glue

Original plywood floors after glue was scraped off

Original plywood floors after glue was scraped off

As for the exterior of the trailer, we continued to strip the paint off. We would paint on a thick layer of citristripper, let it marinate for two hours (or until it began to bubble up) and scrape it off. After most of the paint is scraped off, we would brush off all the little bits we missed with one of those big, nylon scrubbing brushes. Then we pressure washed the rest of the paint and residue off. 

One side of the trailer stripped

One side of the trailer stripped


Look at that glorious aluminum that was hiding under there! I wish we could keep it bare aluminum, but I think every little dent would show up and there are a few areas that have bondo covering them up, which doesn’t look very nice. 

That’s all for this week. Oh! And after a few hours of digging online, I finally found a picture of what the original paint job looked like on our model of trailer. I’m not crazy about it, but it’s cool to see what our lil bean looked like many years ago. 

What the original paint job of the Playmore 140 model looked like

What the original paint job of the Playmore 140 model looked like

Bonus scraping song. I had this stuck in my head the whole time I was scraping. THE WHOLE TIME. 

It can't get any uglier

Today we continued to gut the trailer, ripping out the rest of the cabinets, seating and walls. The walls were originally plywood, but over the years have separated into many thin sheets instead of one solid piece. So the majority of the day was spent tearing off layer after layer. Under about a billion layers of wood was the original framing and insulation. Let me tell you, that fiberglass insulation gets EVERYWHERE and is super itchy. Happy to be (almost) done with it. 


The frame of the trailer had water damage as we were expecting. Some areas we knew would have damage like under the windows and where the leaky water tank was. The curb side wall framing is in great condition. We will only have to replace one or two small pieces of wood. The majority of the damage is on the street side around the windows and corners.

We took out the back window. It had a ton of water damage around the frame and the glass was broken. I’m hoping to replace it with a larger window that opens. The other windows seem to be in good enough shape.

Chris removing windows like a pro

Chris removing windows like a pro

water damage around the window framing

water damage around the window framing

The piece of wood framing that runs along the top corner of the shell had entirely rotted to the point that it just flaked apart when touched. This specific rotted piece of wood makes everything a little bit more complicated. We will likely have to carefully take off the top shell of the trailer to replace the wood and patch the leak in the shell. Taking the shell off isn’t difficult, but it can easily be damaged in the process or in the meantime when it’s being stored away. 


As we were taking the plywood off of the framing, we noticed some of the screws were drilled in from the outside. This means that the interior of the trailer was built first and then the shell was wrapped around the framing. Unlike airstreams, all the cabinets and seating and countertops (and everything else) was built without having to fit through a tiny doorway. Unless we take the shell off, we’re going to have to build everything while inside of that teeny-tiny trailer. Might be a little challenging. 


Meanwhile, we applied some paint stripped (Citristipper gel) to the exterior, just to get an idea of how long it would take and what the skin looked like underneath. I was pleasantly surprised to find gold trim (brass, probably?) on the shell of the trailer. I haven’t seen anything similar to it in other canned hams. Hopefully the trim around the entirety of the trailer is in good condition and it’s not just one weird section of gold trim. We only got to a small portion of it today, though. We also bought a pressure washer to help strip the paint (and because pressure washers are amazing) so that should be here sometime next week. 

Corner of the shell after being stripped

Corner of the shell after being stripped


I have to say, taking the trailer apart makes me feel like this is actually not going to be that hard because the whole thing is held together with 1x3’s and some staples. The construction is so simple. The water, electrical and gas lines are minimal. I know saying this is probably going to come back and bite me in the ass in like a week, but for the time being, I’m feeling super confident and excited about this project! 

I just have to keep telling myself "It literally can't get any uglier from here on out". Because, really. Look at that poor lil' bean. 

so sad looking :( shoutout to the pile of trash in the background

so sad looking :( shoutout to the pile of trash in the background

Demo & (rat) Discovery

So we finally started chipping away at the interior of the bean this week. 

I’ve read a lot of conflicting information about where to begin demo. Some people peel off the skin first, others take apart the interior. There doesn’t seem to be any right or wrong way but the goal here is to figure how how much water damage is in the walls and flooring. We decided to start with the inside for a few reasons. It was expected rain this week and we didn’t want to take off the skin just for everything to get MORE water damage that it already had. Eventually, the skin will have to come off and it may or may not be raining then, so I set up a tented car port over the trailer so we can work in bad weather in the future. 

Visible water damage in both upper corners

Visible water damage in both upper corners

First things first we carefully took everything out of the trailer that we wanted to preserve. We saved the dining table, ice box, stove, sink (although not the faucet because it was broken), the gas powered light and the light over the dining table. We also took off all the hinges, knobs and drawer pulls. The dining table is in pretty bad shape, but we wanted to keep it so we can use it as a pattern to make a new one.

As much as I would have loved to keep the trailer as original as possible, the cabinets were in terrible shape. Many were also installed crooked and some cabinets were even put on backwards. We decided to rip out all the cabinets, seating, curtain rods and the formica on the kitchen counter. Basically, everything else. Let me tell you guys, DEMO IS SO MUCH FUN. You just get to tear shit up. All fun and games until…..

Screen Shot 2016-01-18 at 6.44.49 PM.png

Yes. That is a rats nest constructed out of cardboard and insulation taken from the back of the icebox. That dark stuff on top of the fridge? Rat urine. Did I mention the piles of rat poop we also found? And the possible asbestos? That was fun to clean up. We didn’t actually know if there was asbestos in the trailer, but better safe than sorry, amiright? We broke out the ventilators (you need a special filter for asbestos - P100) and gloves. 

After cleaning and removing remaining cardboard an insulation 

After cleaning and removing remaining cardboard an insulation 


Once we finished cleaning all that up, we started fiddling with the water and propane lines to understand how everything was set up. I was pleasantly surprised to find out that the water situation is actually the most simple thing ever. There is a hose input on the outside of the trailer which connects to the sink and water tank. When the faucet isn’t turned on, the water just goes right into the tank. After doing some research, I also think we need to set up a tank for grey water because (I think) it’s illegal to have grey water runoff. Should be simple enough, though. 

Water line under sink

Water line under sink

Now we just need to take off the rest of the cabinets and seating before we can see how much water damage there really is. 


Until next time,

Marla

Analyzing the Damage

I knew when I bought the bean that there would be lots of problems with it. Some of them I was anticipating like water damage and a little bit of rust. I can handle that. The things I didn't really want to deal with were problems with the frame and shell of the trailer. Most vintage trailers have shell damage. The bean definitely has less shell damage than most other trailers I've seen, but that doesn't mean it's perfect. 

The shell right above the front door.

The shell right above the front door.

As you can see, there's some cracking in the shell along the side and above the door frame. Someone decided to seal it with black caulking, which is fine, it's just hideous. 

The picture below is a flap of aluminum siding that someone attached to use as a shade for the windows in the front of the trailer. They also tried to patch some leaks with putty and caulk. I think the technical term is "a hot mess". It's easy enough to rip off though. 

I love the kitchen SO. MUCH. The cabinets, the hardware, the icebox and stove. How can you not love those? I haven't tested the stove, but it's just a propane hookup, so there shouldn't be too many problems there. 

View looking into the trailer at the kitchenette. Dining area is to the right and lounge/bed is to the left.

View looking into the trailer at the kitchenette. Dining area is to the right and lounge/bed is to the left.

Icebox, stove and sink.

Icebox, stove and sink.

To the right of the kitchen is the dining area. The dinette doubles as a bed. The table folds down to be level with the benches. Under each bench is also a large storage area. The brown light is actually a propane light. I want to keep it, but might try to wire it to make it part of the electrical system. Most of the windows are actually in good shape. I think if I just clean them up they will look much nicer. 

To the left of the kitchen is this kind of bench/bed area. It has two pieces of wood that lay flat to make a twin sized bed. Under the bench is more storage where the water tank is held. I actually think this trailer has more storage than my house. 

Daybed 

Daybed 

The seller was really excited that this trailer still had the original floors which I didn't quite understand because they are beat to shit. There's water damage and lots of chipping. I'm assuming the subfloor is rotted, which means I'll have to replace it. And I think that's the best starting point for the trailer; pulling everything out, saving the bits I want and replace the rotted wood in the frame.

So excited to get started! Stay tuned.

Meet the Bean!

I've spent a lot of time over the past few years daydreaming about renovating a vintage trailer. It probably started a few years ago when my fiancé and I thought about thought about quitting our jobs, dropping out of school and starting a rice pudding truck. Yes, a food truck that sells rice pudding. Thankfully, we didn't do that. I think if we had we would both weigh 400+ lbs right now. 

Instead, I decided to continue my studies as a product design student, all the while casually checking craigslist every so often for vintage trailers. They always seemed too expensive or in a condition that would require basically tearing down the entire trailer and starting from the ground  up. For someone with virtually no experience renovating a trailer, that seemed overwhelming. 

A few days ago I found the tiniest trailer I've ever seen on craigslist. I believe the manufacturers name for it was, "Lil' Loafer". You read that right; LIL LOAFER. How can you not love something with a name like that? After exchanging a few e-mails, I drove out to The Middle of Nowhere, CA, to check it out. Turns out the owner had three trailers he was selling. As much as I loved the name Lil Loafer, I found a slightly larger 13' trailer on his lot that I fell in love with. It's a 1966 Playmor. I spent a while inspecting it before I decided to buy it. I've named her, "The Bean". Right now she's a green bean but when I'm done she might very well be a white or black bean. Who knows. 

1966 Playmor

1966 Playmor

IMG_6261.jpg

The next thing I have to decide is what exactly to do with it. I realize that sounds like something I should have thought about before buying a trailer, and I did think about it a lot. I'm torn between two ideas.

The first is to refurbish the trailer, keeping as much of the original trailer as possible while making it more structurally sound for camping in. I would use it for camping or park it in my backyard and rent it out as an Airbnb. You know, the whole glamping thing. People love that shit.

The other option, and the one that is most exciting to me, is to turn the trailer into a traveling business. As a product design student, I would sell anything from ceramics to clothes to home goods and even small pieces of furniture. This, of course, requires much more planning than the previous idea. I need to figure out the specifics of what kind of business it is, where I would sell things and how much of the trailers interior would need to go. And that's not an easy decision.

As you'll see the next post, the interior is what really makes this trailer so lovable and charming. 


Until next time, 

Marla